


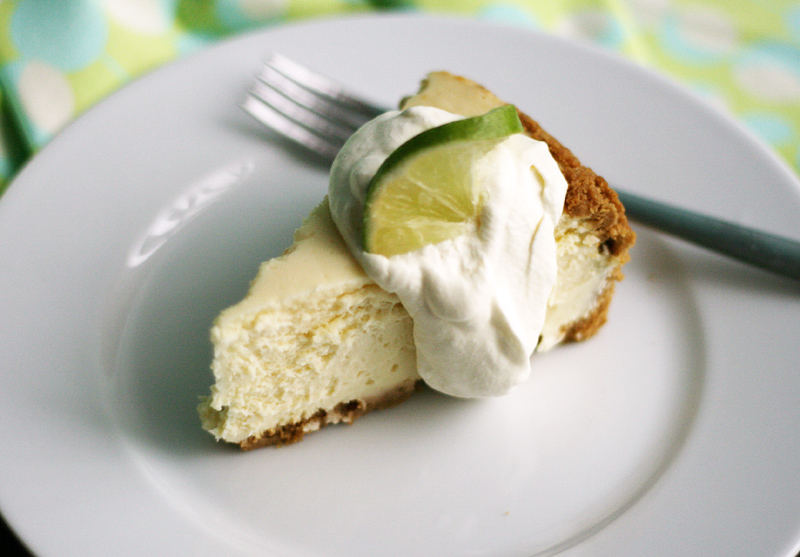
This has been a summer favorite of our family’s for a really long time – and when I took it to a gathering we were invited to last weekend, it was only reaffirmed that this is a perfect summer recipe. It’s light, creamy, cool and refreshing, with a bit of tang to it. I’ll admit, the photographer in me was wishing that I had pulled out the cake to take another photo, since this one is from 2010, when I posted it on my old blog. I have learned SO much since then, but this one will have to do!
I’m not personally a fan of keylime pie. Something about the texture just doesn’t appeal to me – but this? I’ll take this any day.
Keylime Cheesecake
For the crust you’ll need:
2 c. finely crushed graham crackers
6 T. melted unsalted butter
2 T. granulated sugar
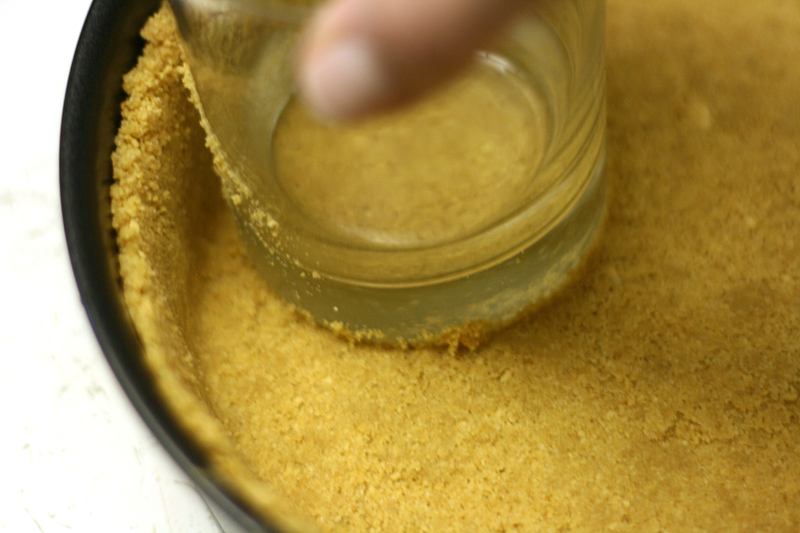
Preheat your oven to 350 degrees. Crush the graham crackers using either a food processor or bowl style coffee grinder (I used mine for this forever before I got a real, live food processor). Melt the butter, and combine all of the ingredients in a bowl. Toss together with a fork until you have an even mix. Pour the mixture into a 9″ springform pan, and press evenly. I love using a flat bottom glass to get a great wall of crust on the side of the pan.
Bake the crust for 5-8 minutes in your preheated oven. Remove the pan to a cooling rack while you mix the filling ingredients.
Reduce the oven heat to 325 degrees.
Filling:
4 – 8 oz. packages of cream cheese, at room temp
1/3 c. keylime juice OR 1/2 c. regular lime juice (they do have a slightly different flavor, but both are very good)
4 eggs, room temp
1-1/3 c. sugar
1 tsp. vanilla
Place the room temperature cream cheese in a large mixing bowl and beat well on medium speed with an electric mixer. It’s important when making cheesecake to NOT whip the ingredients. Air in the filling will cause the cake to crack. Add the sugar and mix again, on medium speed. Add the eggs one at a time, scraping the bowl after adding each to make sure everything is mixing evenly. Add the lime juice and vanilla, and give it a final mix. Slow and steady wins the race on this one.
Pour the filling into the awaiting crust.
The best way to bake a cheesecake is definitely a waterbath. Because cheesecake is not technically a cake, but more of a glorified, modified, pudding, all of the dairy and eggs in the batter need really even heat to bake properly. Otherwise, the outside edges are cooked long before the middle, and you can have an over or underdone cake. So. Here’s how to make a waterbath and protect your springform pan from leaking the water inside.
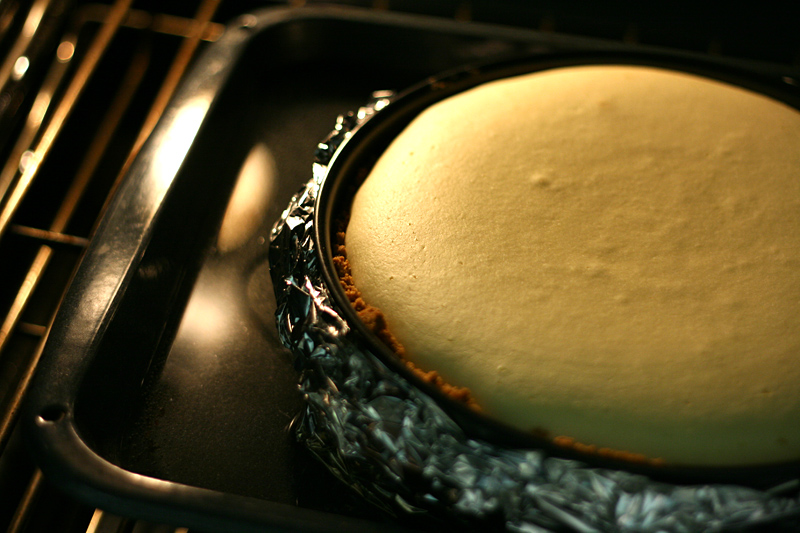
Can you see how beautifully even the cheesecake has baked? Ah. Yes. It’s not that hard – it just takes a few extra minutes of preparation.
Fill a kettle or pan with water and bring it to a boil. While that’s coming to a boil, pull out the broiling pan that came with your oven and place it inside on the middle rack. Pull out two lengths of aluminum foil (nasty stuff, that I basically only keep around for this purpose! I do make a point to only purchase the recycled kind.) Make sure they’re long enough to reach under your pan, and up the sides. Lay the foil on the counter in an “x” shape, and set your springform pan in the middle. Wrap the foil up the sides and scrunch it together. This should keep most of the water from leaking into your pan, but it doesn’t really matter if a bit gets in.
Bake the cheesecake at 325 degrees for 1 hour – 1 hour 15 minutes. You really want it to look just like the above photo, with the filling nice and fluffy looking. It will fall when you remove it from the oven, but wait until you see it fluff all the way to the middle before you take it out. If the middle hasn’t risen, it’s not cooked.
After you remove the cheesecake from the oven, place it on a cooling rack for at least 8 hours, or overnight at room temperature. Then place it in the fridge to chill. (If you toss it straight in the fridge, the cooling will cause condensation, and make it slimy. Eww.
Though all of this may sound a bit complicated, it’s not. I tried to err on the side of giving more information and tips so that you would understand how to make it come out just right.
Once the cheesecake is cooled, top with real whipped cream and garnish with lime.
Whipped Cream
1 c. heavy whipping cream, chilled
1/4 c. powdered sugar
1/2- 1 tsp real vanilla extract
Pour the heavy cream into a mixing bowl, and add the powdered sugar and vanilla. Whip on high speed with an electric mixer until it’s light and fluffy.
Be sure to link me up if you try the recipe! And feel free to post any questions in the comment section.
it looks delicious!
Oh, it is, Dina! We devoured the whole cake with friends this past weekend! ^_^
This pie sounds divine! I wish limes weren’t so dastardly expensive right now.
They do go in and out of season – I actually use bottled juice for this recipe, though! And the fresh ones are just for garnish. Maybe that will help? 🙂